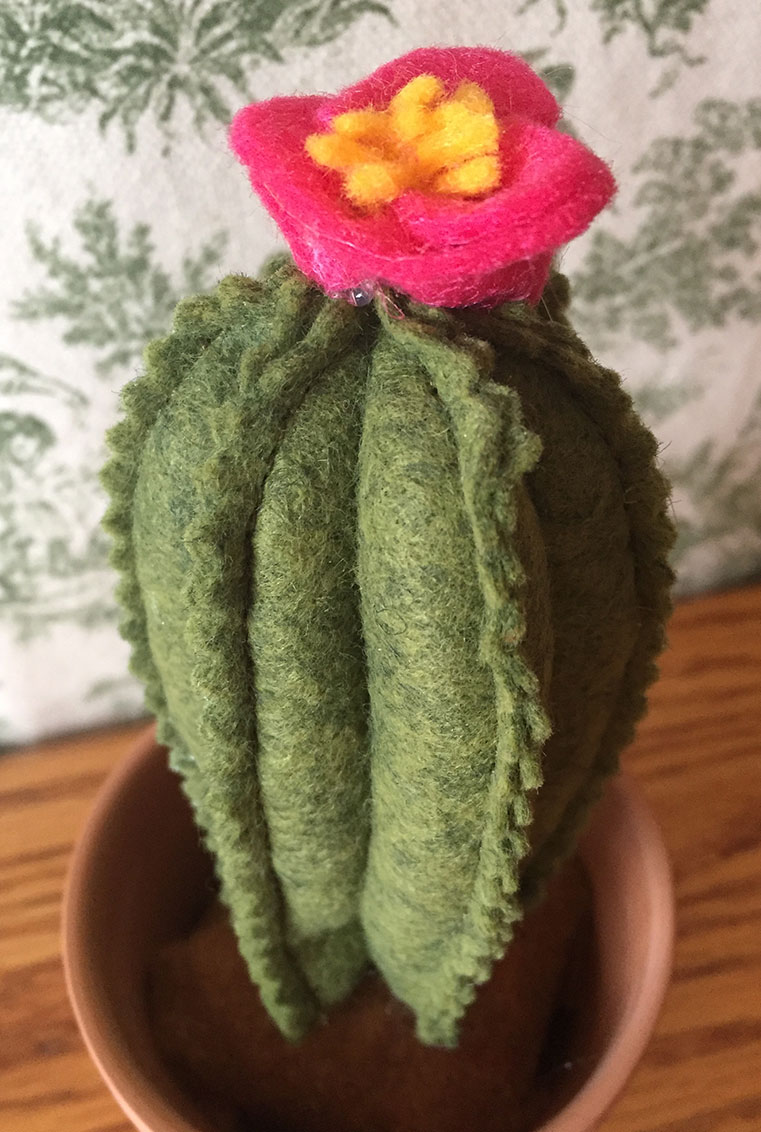
How to Craft A Felt Cactus & Succulent Garden

Supplies:
Craft felt pieces in various greens, flower colors, and brown
Little pot or container (I used 3 inch terracotta in this sample, but little containers made of wood, metal or plastic would work great too.)
Chunk of floral foam or Styrofoam
Glue gun
Fabric scissors
Sewing machine / green thread
Fiber fill
(Optional) Pinking shears
(Optional) Craft paint in various colors (I used an antique copper on the pot and leaf green, peacock blue, and lavender on the tips of leaves.)
Crafting Directions for Cactus with Flower:
Using my free downloadable template, CactusSucculentTemplate, cut out 3 pairs of cactus shapes. You can either use fabric scissors or pinking shears.
Sew around each pair, close to the edge.
Stack the three sets together and sew down the middle.
Using a skewer blunt end, loosely stuff each pocket with fiber fill.
To make the flower, cut a piece of pink felt 3 x 1/2 inches, making one long edge wavy. Then cut a yellow piece 1 x 1/2 inch, fringing one long edge.
Begin the flower by rolling the yellow into a spiral and add a dot of hot glue to secure. Then continue rolling with the pink to create the flower petals, adding dots of glue as you roll.
Carefully add glue to the bottom of the flower and quickly attach to the top of the cactus.
Tips for Success: Use small amounts of hot glue and avoid adding it to areas that will show on the outside to keep things looking clean. If you get a blob where you don’t want it, you can shave it off by carefully cutting it with scissors after it dries.
Crafting Directions for the Pot:
Cut a piece of foam to fit snugly into the pot, and about 1/2 inch below the top edge of the pot.
Cut a piece of brown felt in a 4 inch circle.
Glue the felt to the floral foam and glue the foam into the bottom of the pot.
If needed, rub a little watered down antique copper paint to the outside and inside rim of the pot to give it a little patina.
Crafting Directions for the Grassy Succulent:
Cut a piece of green felt about 5 x 2 1/2 inches. Cut narrow fringe with pointy ends along the long edge. To create varying grass heights, cut a third the full height, a third 3/4 height, and then a third 1/2 height.
Roll the felt starting with the tall grass for the center.
Add a little hot glue to secure at the end of the roll.
Crafting Directions for the Hens & Chicks Succulent:
(This makes a small plant to combine with others in the 3 inch pot. To make a plant to fill a 3 inch pot on its own, use all the leaf sizes.)
Using my free downloadable template, CactusSucculentTemplate, cut out 6 extra small and 6 small leaves from bright green felt.
To add some depth, paint the ends with a little watered down craft paint. I blended green, then peacock blue in a “U” shape around the ends, and a dab of lavender at the tips.
To start creating the plant, turn one of the extra small leaves sideways and loosely roll into a spiral. Add a little dab of hot glue.
Then add one leaf at a time around the outside of the spiral with a little dab of hot glue at the base. Place the 5 extra small leaves to fit around one time, like flower petals. Then add the small leaves in a second layer, staggering the tips.
Cut off the bottom about 1/4 inch to make a flat base.
Assemble the Garden:
Arrange the three plants in the pot, checking spacing and angles.
Add hot glue to the bases of the plants and press into the felt dirt.
So cute and crafty! Enjoy your new little desktop garden.


Leave A Comment